Hifod: social network platform
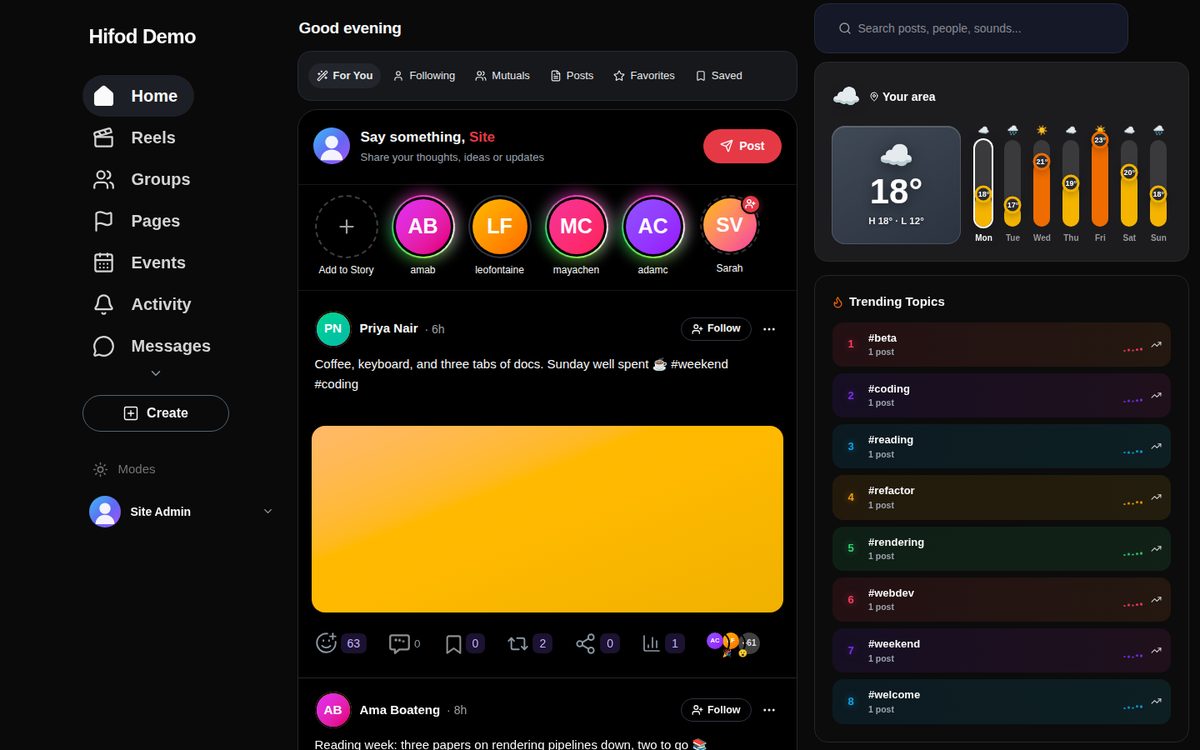
Hifod is a complete, self-hosted social network you install on your own server. Members post, share stories and reels, chat, join groups, sell in a marketplace, run fundraisers and pay each other through a built-in wallet. You manage all of it from one admin panel.
This guide is written for site owners, not programmers. Every step tells you what to click or type. If you get stuck, see Troubleshooting or contact support.
Main features
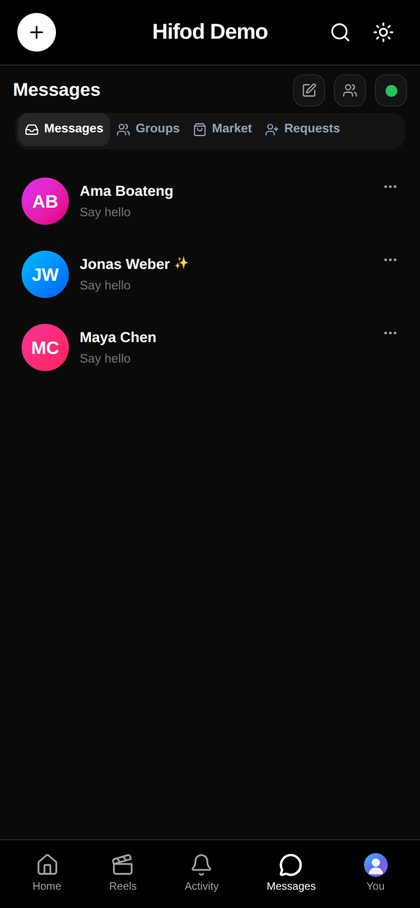
2.Server requirements
Hifod is a Node.js application (built with Next.js and React). It needs a host that can run Node.js apps. Plain PHP-only shared hosting will not work. Most cPanel hosts that offer "Setup Node.js App" work, and so does any VPS.
| Item | Minimum | Notes |
|---|---|---|
| Node.js | 20.9 or newer | Node 20 LTS or 22 LTS recommended. |
| Database | MySQL 8.0 or MariaDB 10.6+ | An empty database, plus a user with all privileges on it. |
| Memory (running) | 1 GB RAM | 2 GB or more for busy sites. |
| Memory (building) | 4 GB RAM | Only needed if you rebuild the app. The download is already built. |
| Disk | 2 GB free | About 700 MB is Node packages. Uploads need more space, or use cloud storage. |
| SSL | Recommended | HTTPS is needed for sign-in cookies on most browsers, and by payment gateways. |
| Optional | Any SMTP account (for sign-up codes and password reset). | |
| Browsers | Latest Chrome, Firefox, Safari, Edge and Opera, on desktop and mobile. | |
3.What is in the download
Unzip the file you downloaded from CodeCanyon. You will see:
hifod-codecanyon/
├── Main files/
│   └── hifod/            ← the application (upload this)
│       ├── app/  components/  lib/  themes/  public/  scripts/
│       ├── .next/        ← the ready-built app
│       ├── .env.example  ← settings template
│       ├── server.js     ← startup file for cPanel
│       └── package.json
├── Documentation/
│   └── index.html        ← this guide
└── Licensing/
    └── credits.txt       ← third-party licences
Only the hifod folder goes on your server.
4.Install on cPanel (about 20 minutes)
Use this route if your cPanel has Software → Setup Node.js App. You don't need a terminal, and nothing has to be built on the server.
public_html already has another site (WordPress, etc.), use a subdomain such as social.yourdomain.com.- Create the database. Go to cPanel → MySQL Databases. Create a database and a user, then add the user to the database with All Privileges. Write down the database name, username and password.
- Upload the files. Open File Manager. In your home folder (not inside
public_html), create a folder, for examplehifod. Zip the contents ofMain files/hifodon your computer, upload the zip into that folder, then right-click it and choose Extract.Turn on Settings → Show Hidden Files in File Manager. Then check that.nextand.env.exampleare in the folder. - Create the Node.js app. Go to Setup Node.js App → Create Application:
Click Create.
Node.js version 20 or newer Application mode Production Application root hifod(the folder from step 2)Application URL your domain or subdomain Application startup file server.js - Install the packages. On the same app page, click Run NPM Install. Wait until it finishes. It usually takes 2–4 minutes.
- Start the app. Click Restart, then open your domain in a browser.
- Run the setup wizard. The wizard opens by itself. Follow section 6. It asks for your purchase code and your database details, then creates your admin account.
.htaccess file in the domain's document root that belongs to another app. Remove other apps' rewrite rules from that file. The lines Passenger adds for Hifod must stay.5.Install on a VPS (Ubuntu, Nginx, PM2)
Use this route on your own server (DigitalOcean, Hetzner, AWS, etc.) or on any panel without a Node.js app screen. The commands are for Ubuntu 22.04/24.04.
5.1 Install Node.js, MySQL and Nginx
curl -fsSL https://deb.nodesource.com/setup_20.x | sudo -E bash -
sudo apt install -y nodejs mysql-server nginx unzip
sudo npm install -g pm2
5.2 Create the database
sudo mysql
CREATE DATABASE hifod CHARACTER SET utf8mb4 COLLATE utf8mb4_general_ci;
CREATE USER 'hifod'@'localhost' IDENTIFIED BY 'choose-a-strong-password';
GRANT ALL ON hifod.* TO 'hifod'@'localhost';
FLUSH PRIVILEGES;
EXIT;
5.3 Upload and start the app
# upload the hifod folder to /var/www/hifod, then:
cd /var/www/hifod
npm install
pm2 start server.js --name hifod     # listens on port 3000
pm2 save && pm2 startup
.env for you. You can also do it yourself first: cp .env.example .env, edit it, then run npm run db:setup to create the tables.5.4 Point your domain at it (Nginx)
Create /etc/nginx/sites-available/hifod:
server {
    listen 80;
    server_name yourdomain.com;
    client_max_body_size 200M;

    location / {
        proxy_pass http://127.0.0.1:3000;
        proxy_http_version 1.1;
        proxy_set_header Host $host;
        proxy_set_header X-Forwarded-For $proxy_add_x_forwarded_for;
        proxy_set_header X-Forwarded-Proto $scheme;
        proxy_set_header Upgrade $http_upgrade;
        proxy_set_header Connection "upgrade";
    }
}
sudo ln -s /etc/nginx/sites-available/hifod /etc/nginx/sites-enabled/
sudo nginx -t && sudo systemctl reload nginx
sudo apt install -y certbot python3-certbot-nginx
sudo certbot --nginx -d yourdomain.com      # free SSL
Open your domain. The setup wizard appears.
npm install, start server.js with PM2, and add a reverse proxy from your domain to 127.0.0.1:3000.6.The setup wizard
The first time you open the site, the wizard opens. It has five steps. You can go back to any finished step.
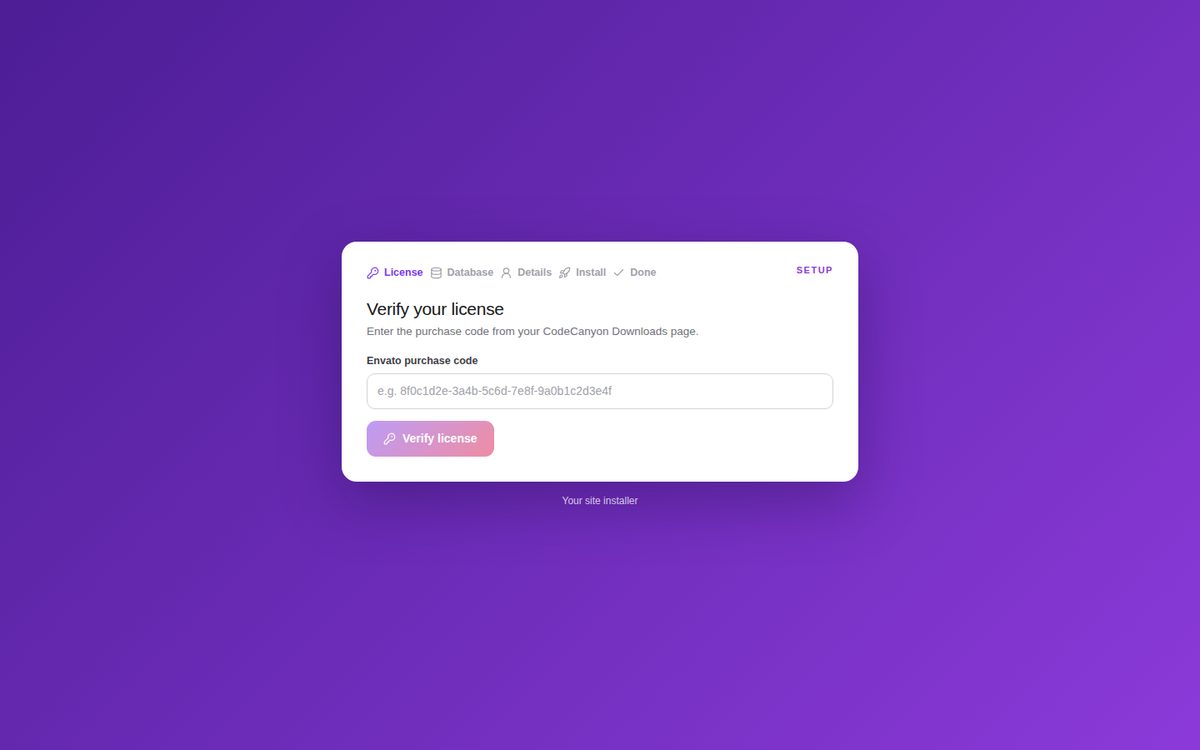
Step 1: Licence
Paste your Envato purchase code. You can find it on CodeCanyon under Downloads → Hifod → Download → License certificate & purchase code. The code is linked to the domain you install on (see section 16).
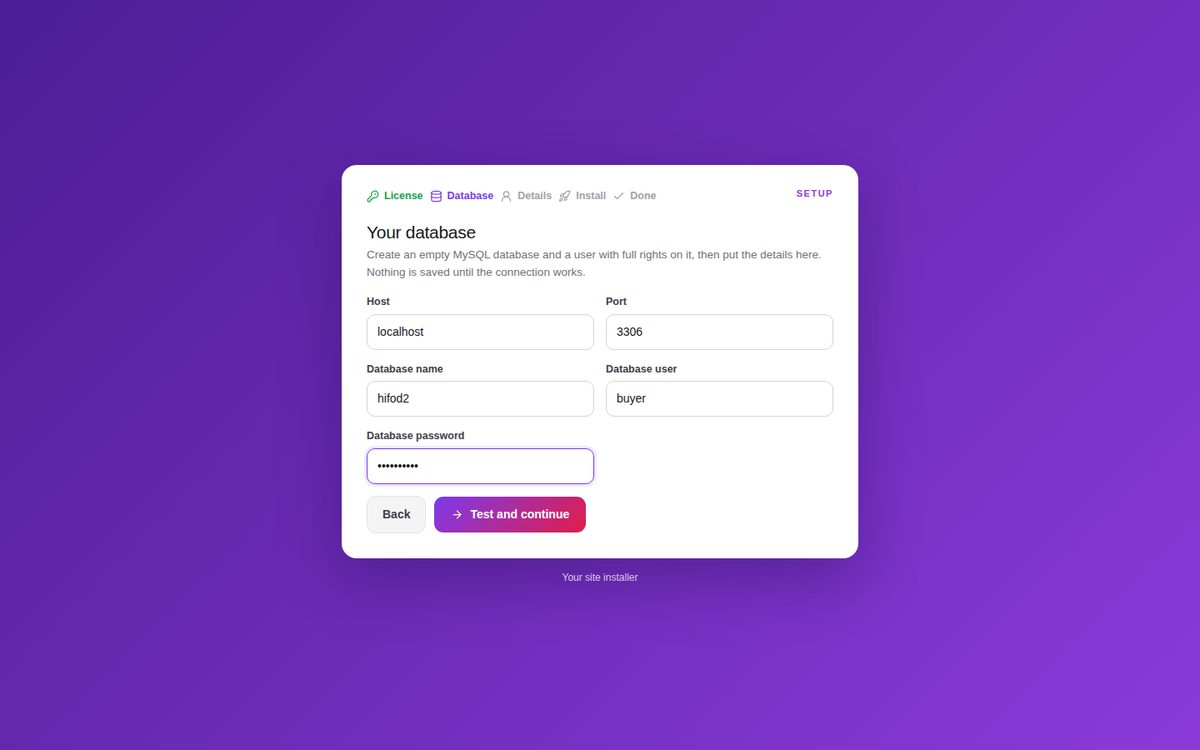
Step 2: Database
Enter the host (usually localhost), port (3306), database name, user and password from step 1. The wizard tests the connection, saves the details to .env and creates the tables. If the connection fails, nothing is saved.
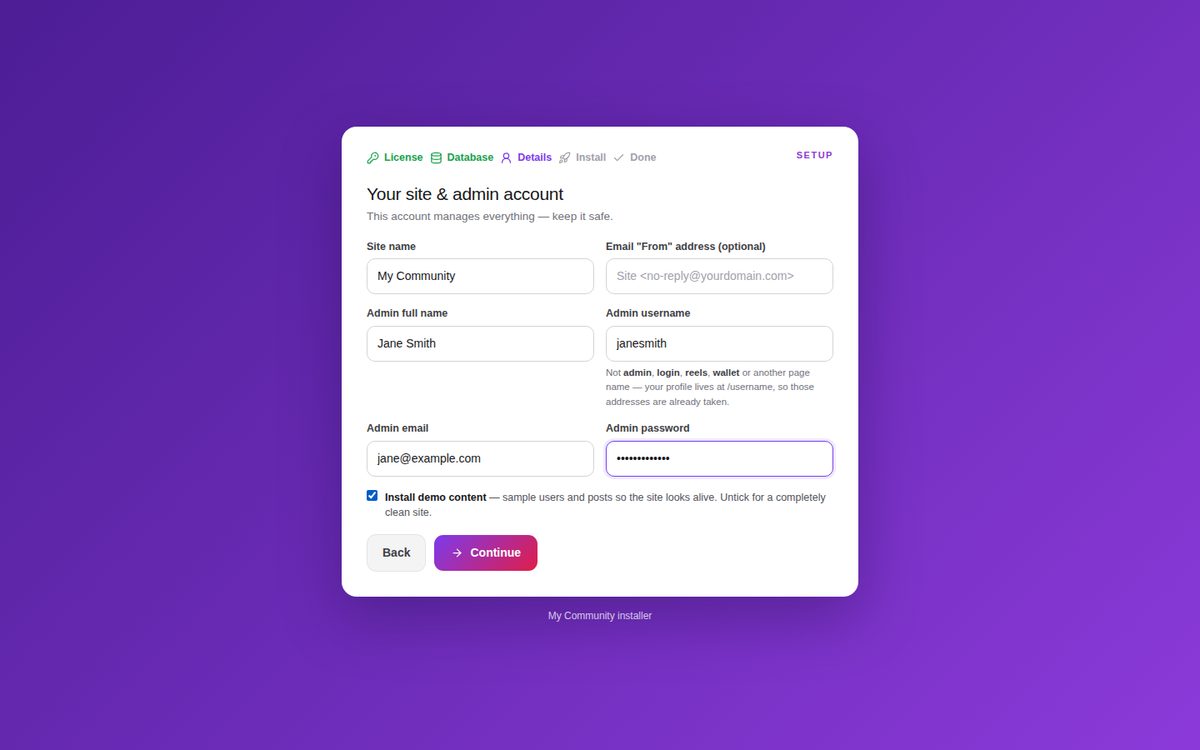
Step 3: Site and admin details
Choose the site name, the email address outgoing mail is sent from (optional), and your admin account. Leave Install demo content ticked if you want sample members and posts to explore. Untick it for a clean site.
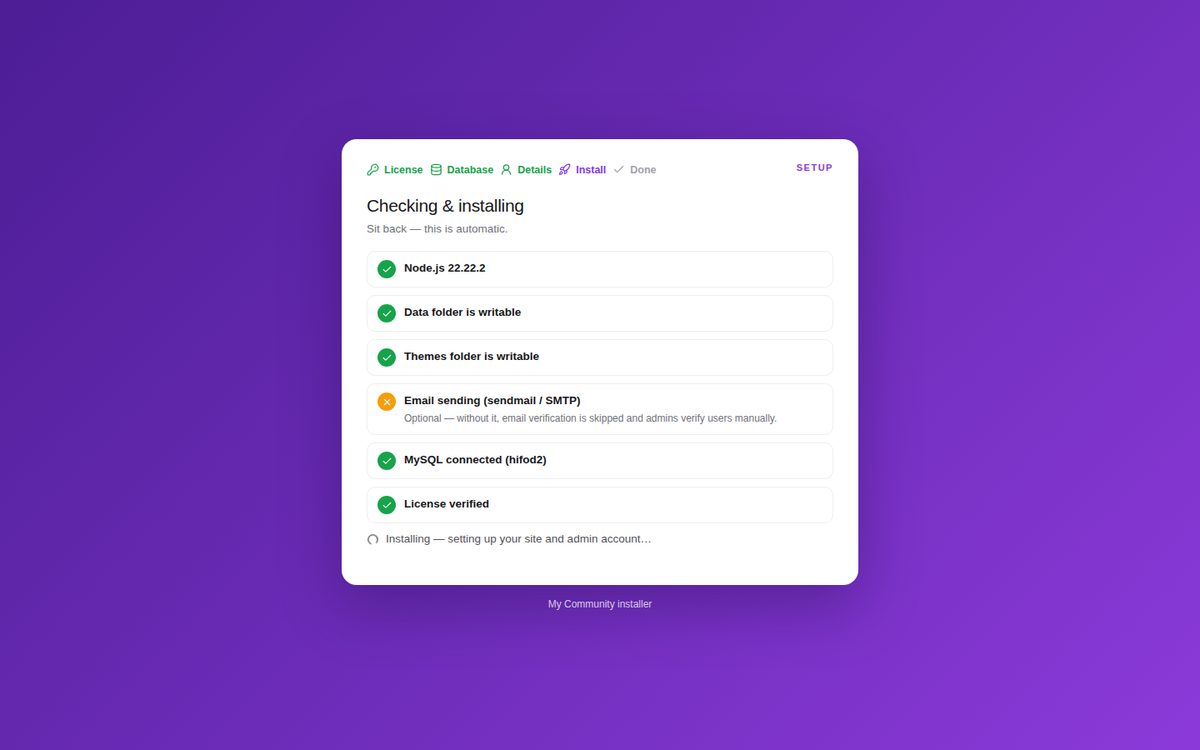
Step 4: Checks and install
The wizard checks Node.js, folder permissions, email, the database and the licence, then installs. Email is optional. Without it, the site shows sign-up codes on screen.
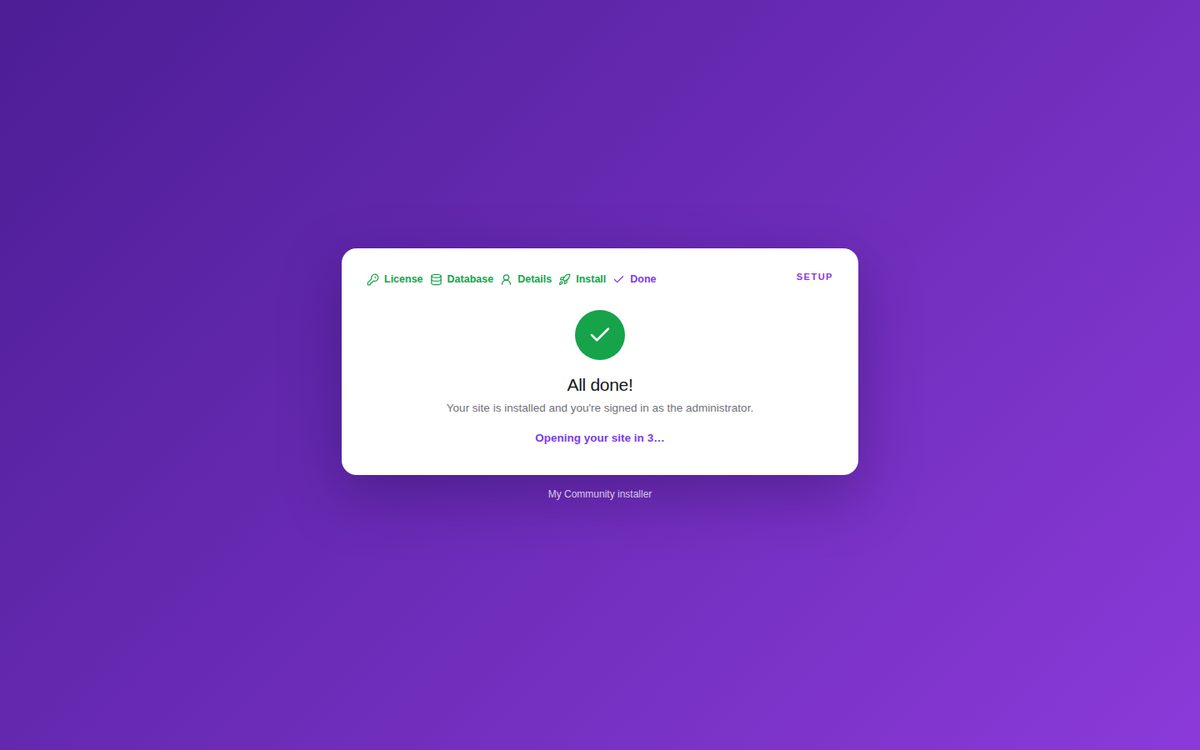
Step 5: Done
You are signed in as the administrator and taken to your new site. The wizard locks itself after this, so nobody can run it again.
7.First steps after install
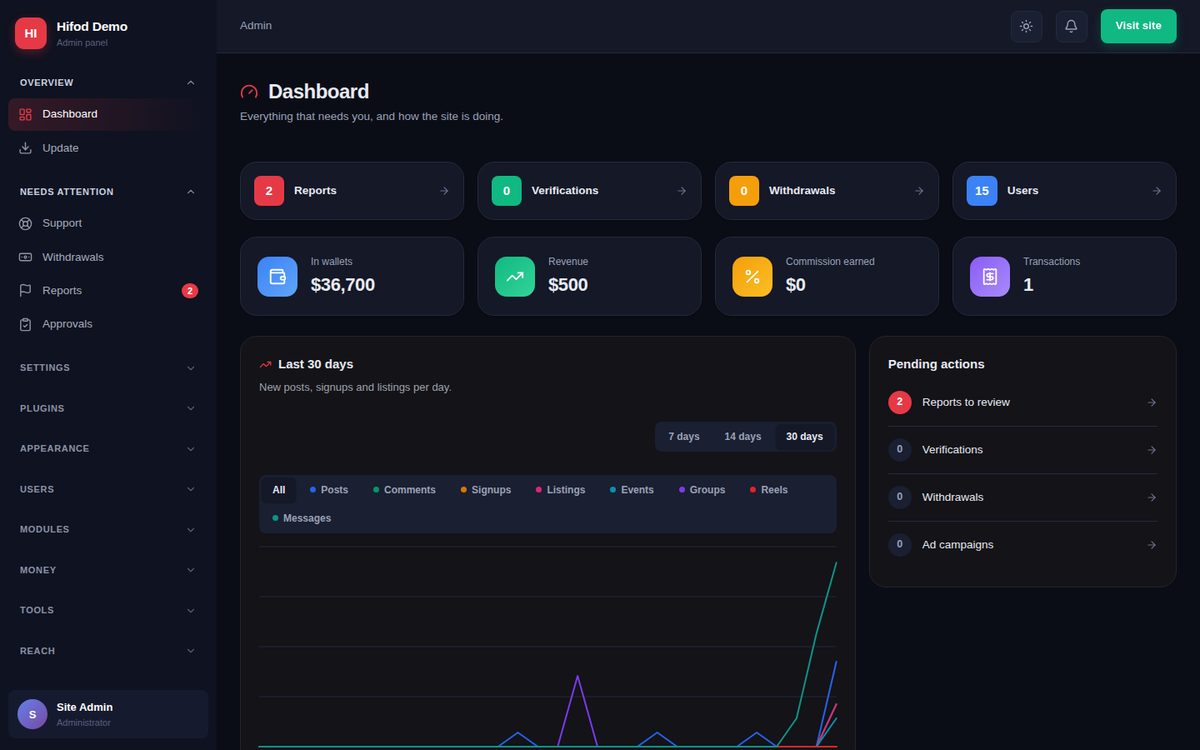
Open the admin panel from your avatar menu, or go to yourdomain.com/admin.
- Settings → General: site name, logo, tagline, date format, distance unit and currency.
- Settings → Email: add your SMTP details and send a test (details).
- Tools → Static pages: replace the sample Terms, Privacy and About text with your own.
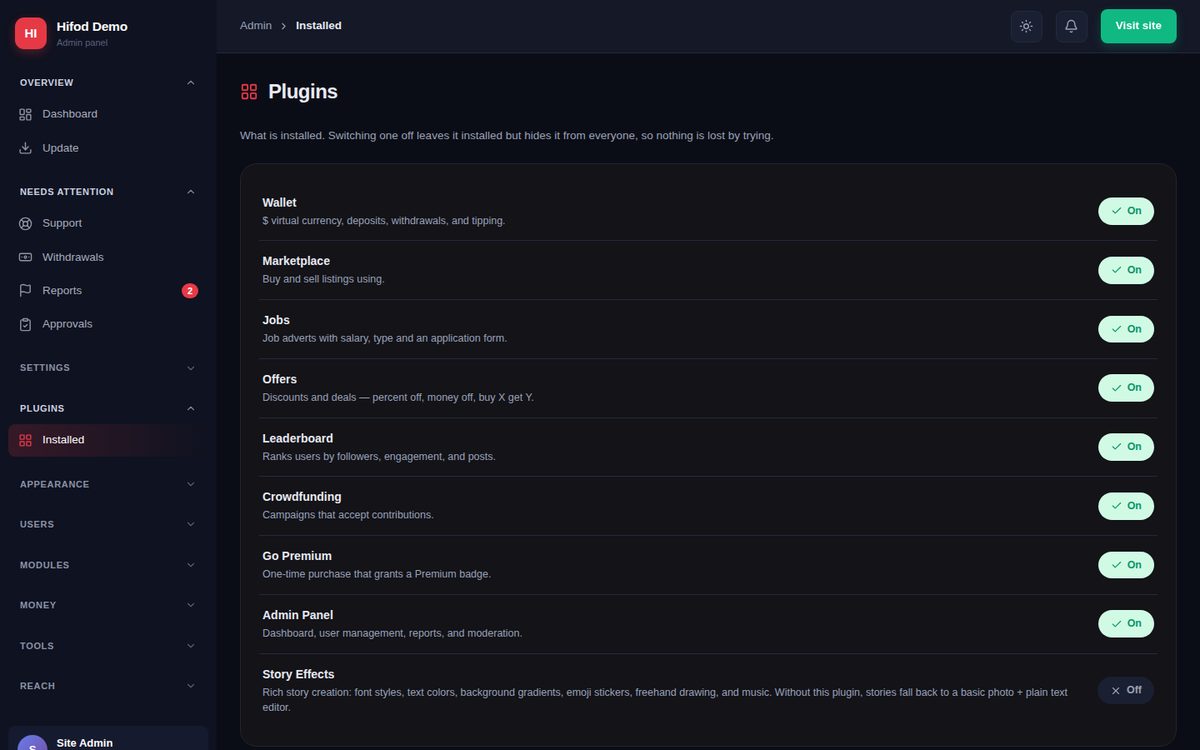
- Plugins → Installed: switch off any features you don't want.
- Money → Payments and gateways: connect at least one gateway if you want to take payments (details).
- Settings → Registration: choose who can join and how accounts are confirmed.
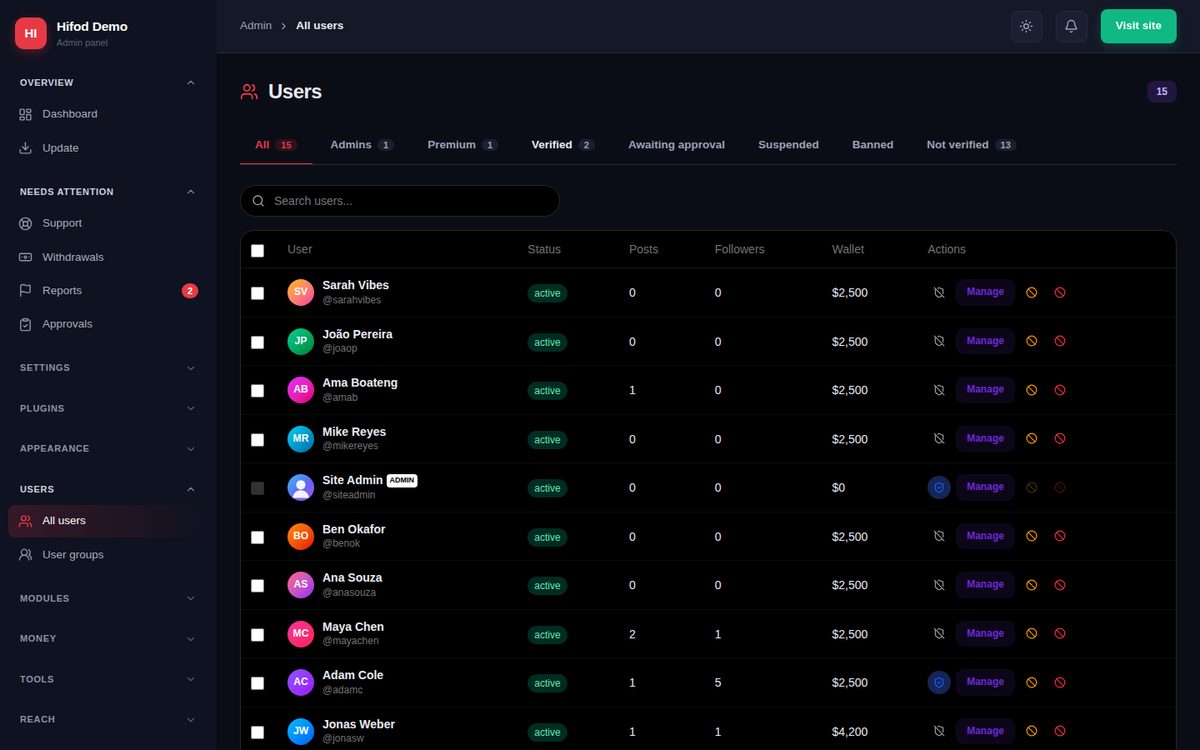
- If you installed demo content, remove the sample members from Users → All users before launch.
8.Configuration (.env)
Server settings live in the .env file in the app folder. The wizard writes the database lines for you. Everything else is set in the admin panel. After you edit .env, restart the app.
| Variable | What it does | |
|---|---|---|
DB_HOST | Database server, usually localhost | required |
DB_PORT | Database port, usually 3306 | required |
DB_NAME | Database name | required |
DB_USER | Database user | required |
DB_PASSWORD | That user's password (DB_PASS also works) | required |
SESSION_SECRET | Signs sign-in cookies. If empty, a random key is created on first start and saved in data/.session-secret. | optional |
DB_POOL | Open database connections (default 10) | optional |
SMTP_HOST | Mail server. The other mail settings are in Admin → Settings → Email. | optional |
MAIL_FROM | The address mail is sent from | optional |
PORT | Port the app listens on (default 3000). cPanel sets this for you. | optional |
.env private. It holds your database password. Never put it inside public_html.9.Admin settings
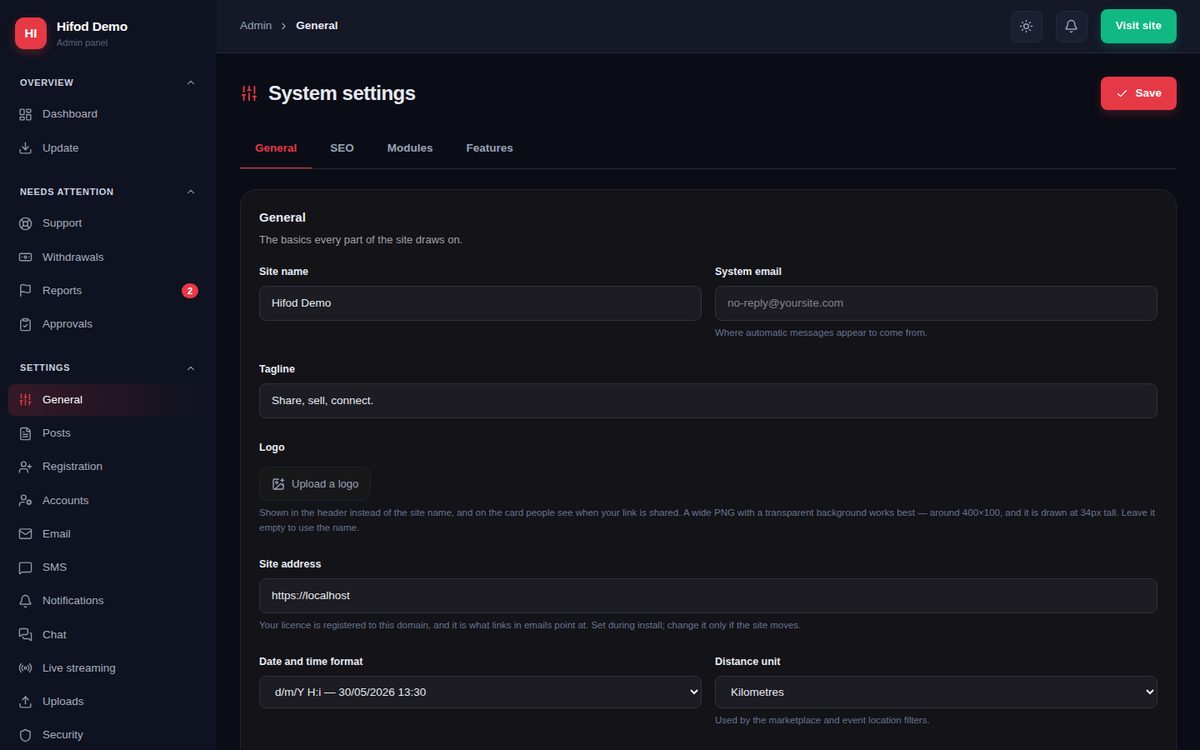
All settings are under Admin → Settings. Each page has tabs, and each tab has its own Save button.
| Page | What you set there |
|---|---|
| General | Site name, system email, tagline, logo, site address, date format, distance unit, currency, SEO, and which modules and features are on. |
| Posts | Post and comment length, posting rate limits, default privacy, feed source, stories, moderation, translation test. |
| Registration | Open or invite-only sign-up, email or SMS confirmation, approval of new members, minimum age, accounts per IP, invitations, blocked email providers. |
| Accounts | Username changes, account deletion, strong passwords, follow limits, session length, social login, privacy defaults. |
| SMTP server, which emails are sent, and a test button. | |
| SMS | Twilio, BulkSMS, Infobip or Msg91, with a daily limit. |
| Notifications | On-site, email, web app, messaging apps (Telegram, WhatsApp) and push (OneSignal). |
| Chat | Messaging on/off, photos, voice notes, group chats, typing and read indicators, audio and video calls. |
| Live streaming | Live video through Agora, recording and maximum length. |
| Uploads | File size limits, allowed types, video length, watermark, cloud storage, image moderation. |
| Security | Login lockout, new-device alerts, two-factor authentication, captcha, blocked words and names. |
| Limits | Results per page for each part of the site. |
| Analytics | Google Analytics or Tag Manager ID, or any tracking snippet. |
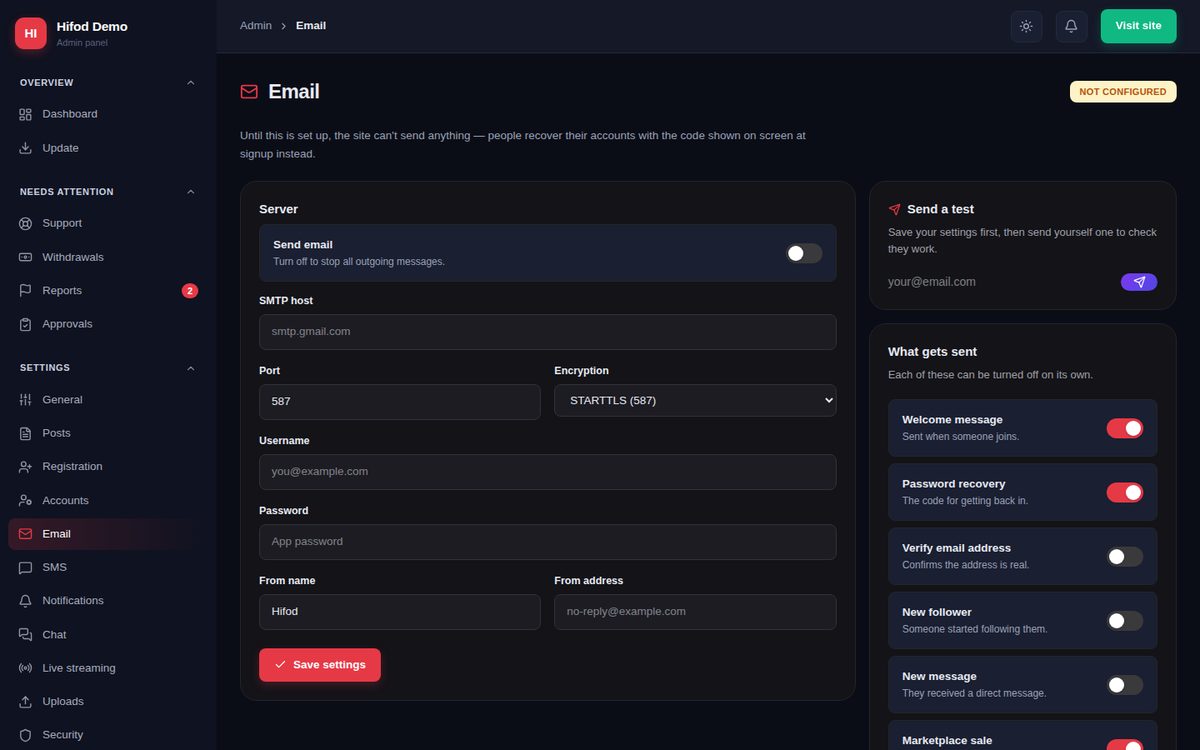
Go to Settings → Email. Enter the SMTP host, port, encryption, username, password, and the "from" name and address. Save, then click Send a test. Common hosts: Gmail smtp.gmail.com (needs an app password), Outlook smtp-mail.outlook.com, SendGrid smtp.sendgrid.net, or your host's own mail server.
Uploads and cloud storage
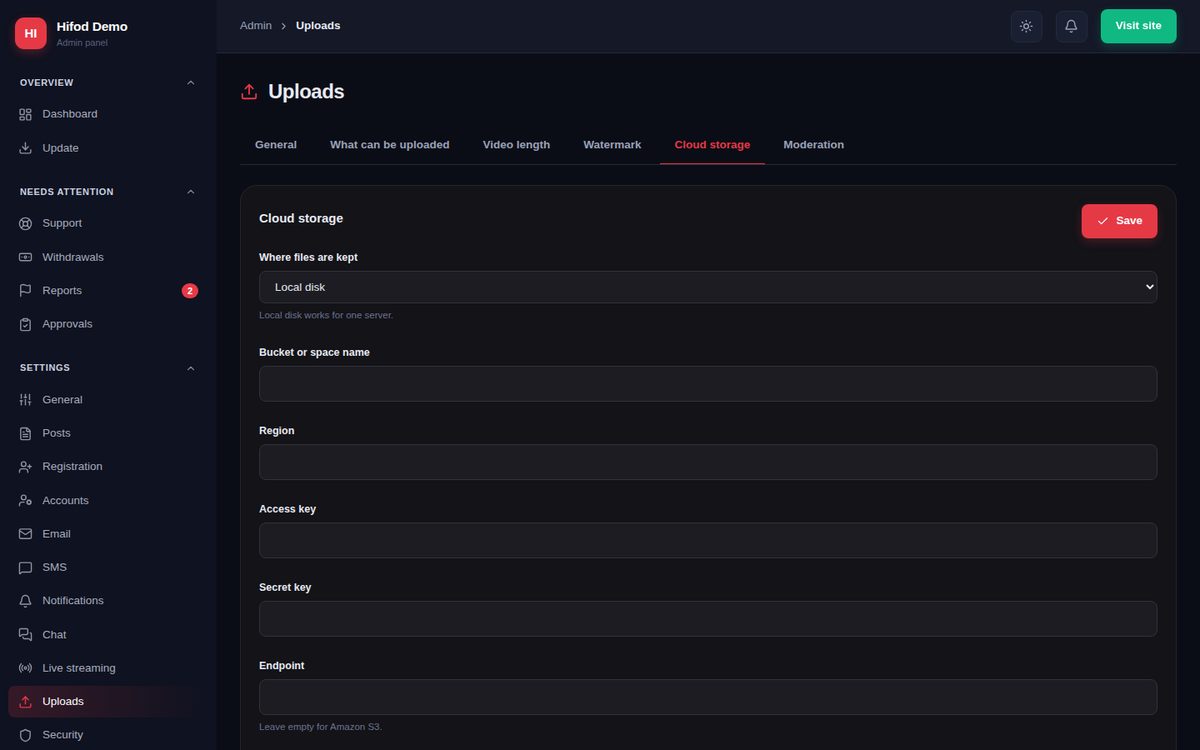
By default, uploads are saved in the data/uploads folder on your server. To store them in the cloud instead, open Settings → Uploads → Cloud storage and choose Amazon S3, Cloudflare R2, DigitalOcean Spaces, Wasabi or Backblaze B2. Then enter the bucket, region, access key, secret key and (except for Amazon S3) the endpoint.
Social login
In Settings → Accounts → Social login, add a client ID and secret for Google, Facebook, X (Twitter) or GitHub. When the provider asks for a callback (redirect) URL, use:
https://yourdomain.com/social/google
https://yourdomain.com/social/facebook
https://yourdomain.com/social/twitter
https://yourdomain.com/social/github
SMS, push notifications and live video
- SMS (Settings → SMS): choose a provider and paste its keys. SMS is used for phone confirmation and two-factor codes.
- Push (Settings → Notifications → Push): paste your OneSignal App ID and REST API key from app.onesignal.com.
- Telegram and WhatsApp (Settings → Notifications → Messaging apps): paste a Telegram bot token, or a WhatsApp phone number ID and access token.
- Live streaming (Settings → Live streaming): paste your Agora App ID and App certificate. Add the Customer ID and certificate if you want recordings.
- Audio and video calls (Settings → Chat → Audio & video calls): choose a provider and paste its keys.
Each of these services is optional and bills you directly. Hifod works without them.
Security
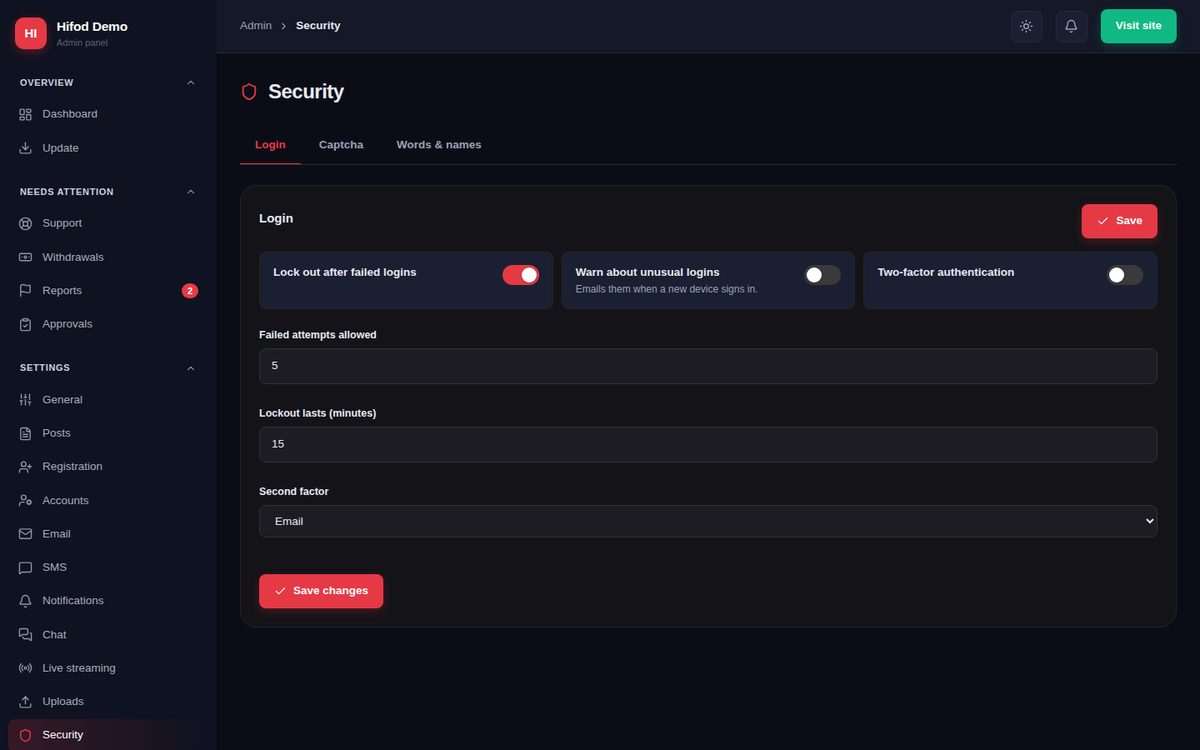
In Settings → Security you can lock accounts after failed logins, email members when a new device signs in, and turn on two-factor authentication (email, SMS or an authenticator app). The Captcha tab supports Cloudflare Turnstile, Google reCAPTCHA and hCaptcha on sign-up and login.
10.Payments and money
Money moves through the member wallet. Members top up with a gateway, then spend on memberships, tips, gifts, adverts, marketplace items and campaigns. The site owner can keep a percentage as commission.
Set up a gateway
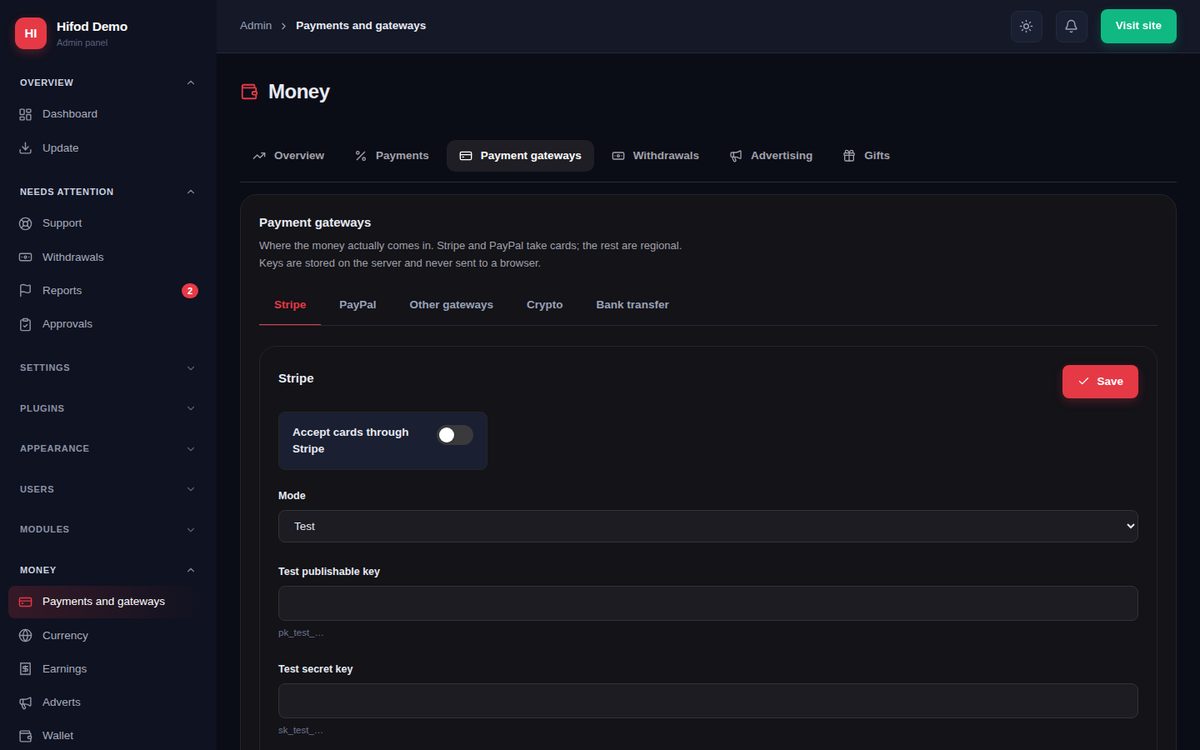
- Open Admin → Money → Payments and gateways → Payment gateways.
- Choose a tab: Stripe, PayPal, Other gateways, Crypto or Bank transfer.
- Turn the gateway on, paste its keys, and click Save. Start in Test/Sandbox mode, make a test payment, then switch to Live.
- In the gateway's own dashboard, add the webhook URL below. Payments are credited only when the gateway confirms them through this URL.
| Gateway | Keys needed | Webhook / callback URL |
|---|---|---|
| Stripe | Publishable key, secret key, webhook signing secret | /api/payments/webhook/stripe |
| PayPal | Client ID, client secret, webhook ID | Handled on return (/api/payments/paypal/capture) |
| Razorpay | Key ID, key secret | /api/payments/webhook/razorpay |
| Paystack | Secret key | /api/payments/webhook/paystack |
| Flutterwave | Public key, secret key | /api/payments/webhook/flutterwave |
| Mercado Pago | Public key, access token | /api/payments/webhook/mercadopago |
| Authorize.net | API login ID, transaction key, signature key | /api/payments/webhook/authorizeNet |
| Coinbase Commerce | API key, webhook secret | /api/payments/webhook/coinbase |
| CoinPayments | Merchant ID, IPN secret | /api/payments/webhook/coinpayments |
| Bank transfer | Your bank details | None. You approve receipts by hand. |
Put your domain in front of each path, for example https://yourdomain.com/api/payments/webhook/stripe.
Fees, currency and withdrawals
- Payments → Settings: commission percentage, VAT, currency, and minimum/maximum top-up and withdrawal.
- Withdrawals: members request a payout from their wallet. You approve and pay it (PayPal Payouts can do this automatically), and the request appears under Needs attention → Withdrawals.
- Earnings shows the commission you have made. Wallet shows every balance and transaction.
11.Features guide
Feed, posts and stories
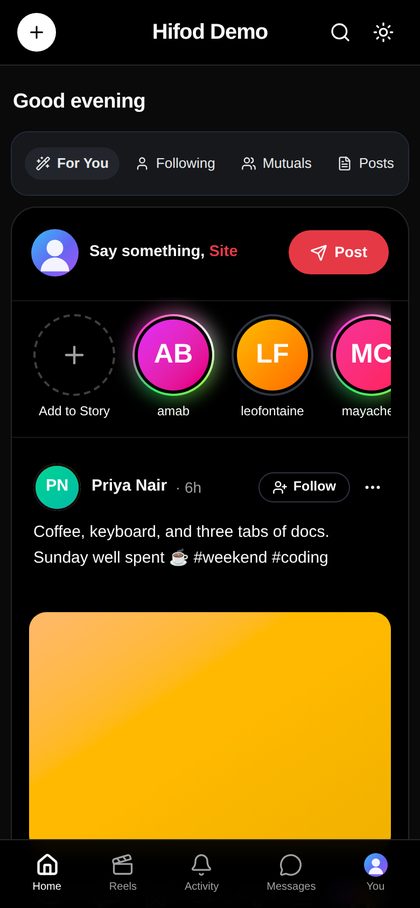
Members post from the composer at the top of the feed. They can add photos, video, a poll, a feeling, a location or a background colour. Links from YouTube, Instagram, Facebook and TikTok show as embeds. The feed has For you, Following, Mutuals, Posts, Favorites and Saved tabs. Stories sit above the feed and disappear after 24 hours.
Reels
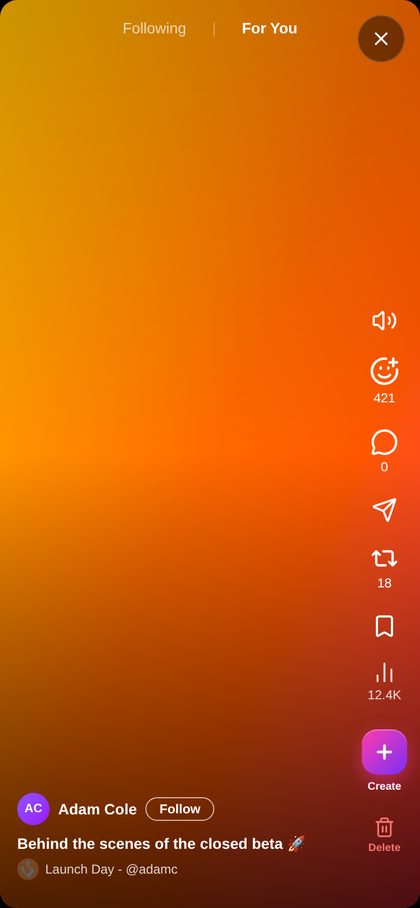
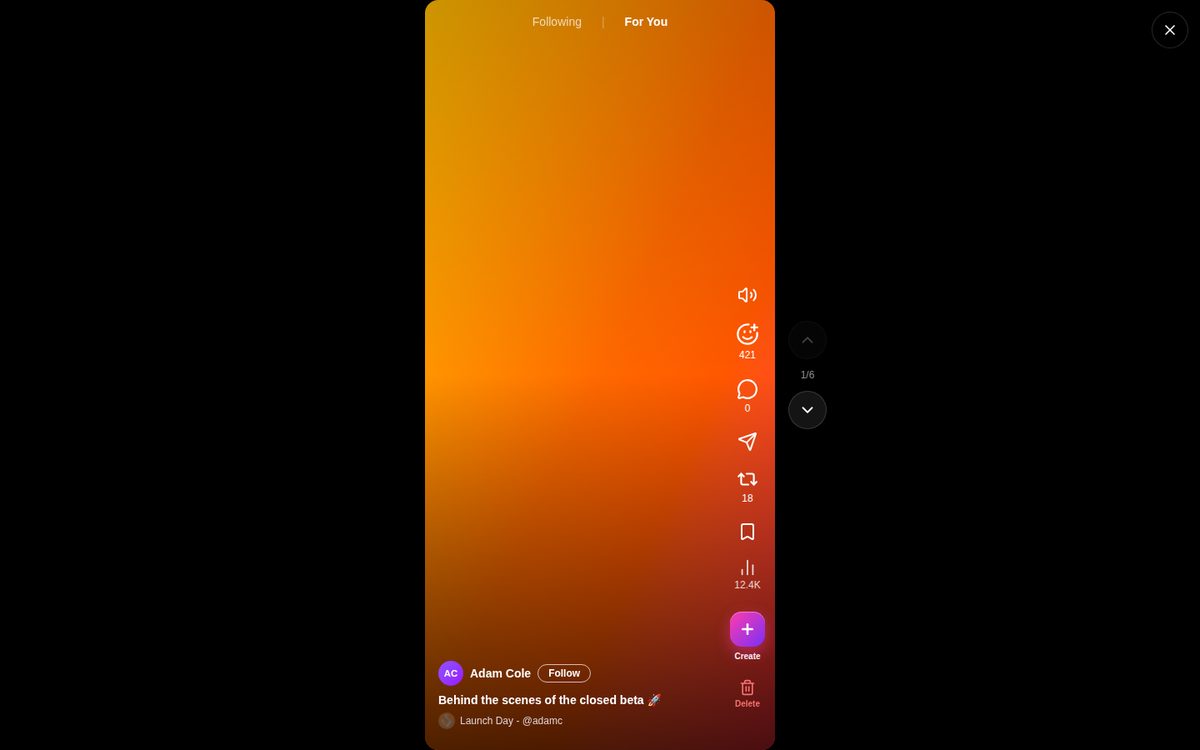
A full-screen vertical video feed with likes, comments, shares and follow. Length limits are set in Settings → Uploads → Video length.
Groups, pages and events
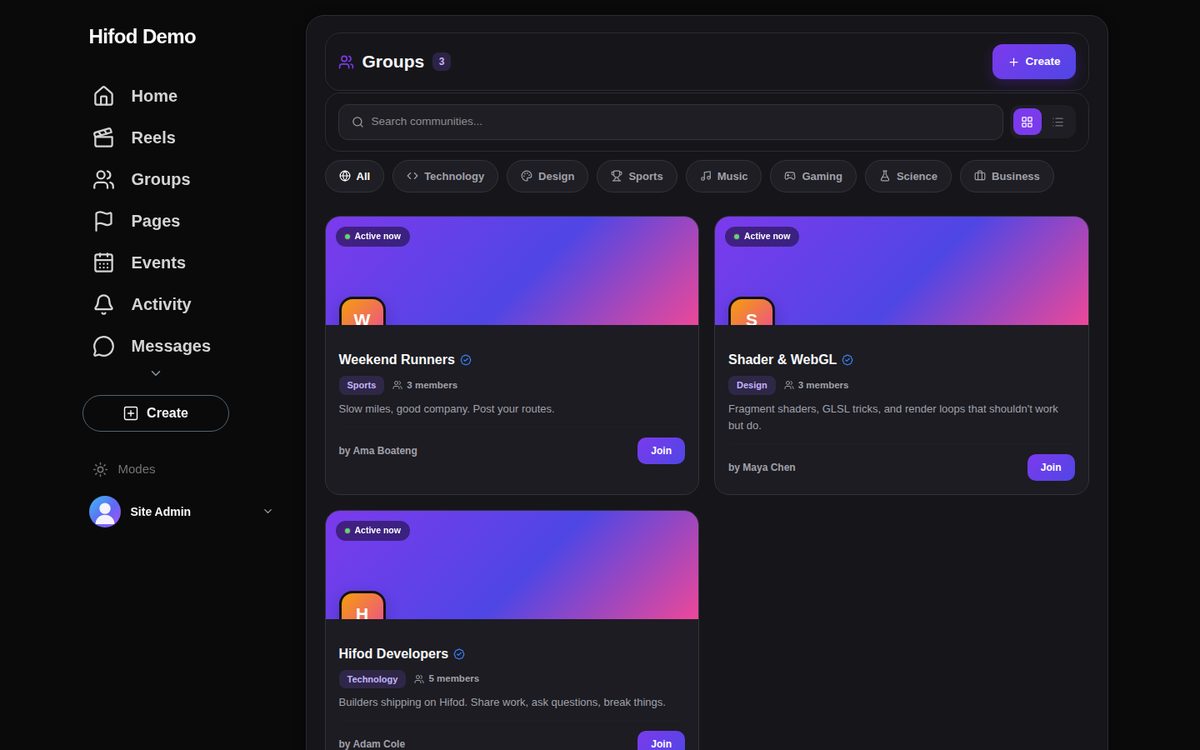
Members create groups (people talking together) and pages (a brand or public figure) from Groups and Pages. Categories are managed in Admin → Modules. Events have a date, a place or an online link, and RSVPs.
Messages
One-to-one and group conversations with photos, video and voice notes. Members can accept or ignore message requests from people they don't follow.
Marketplace
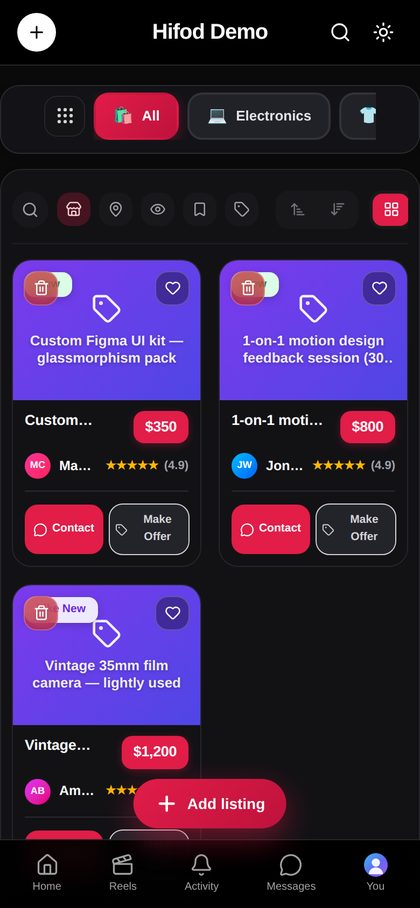
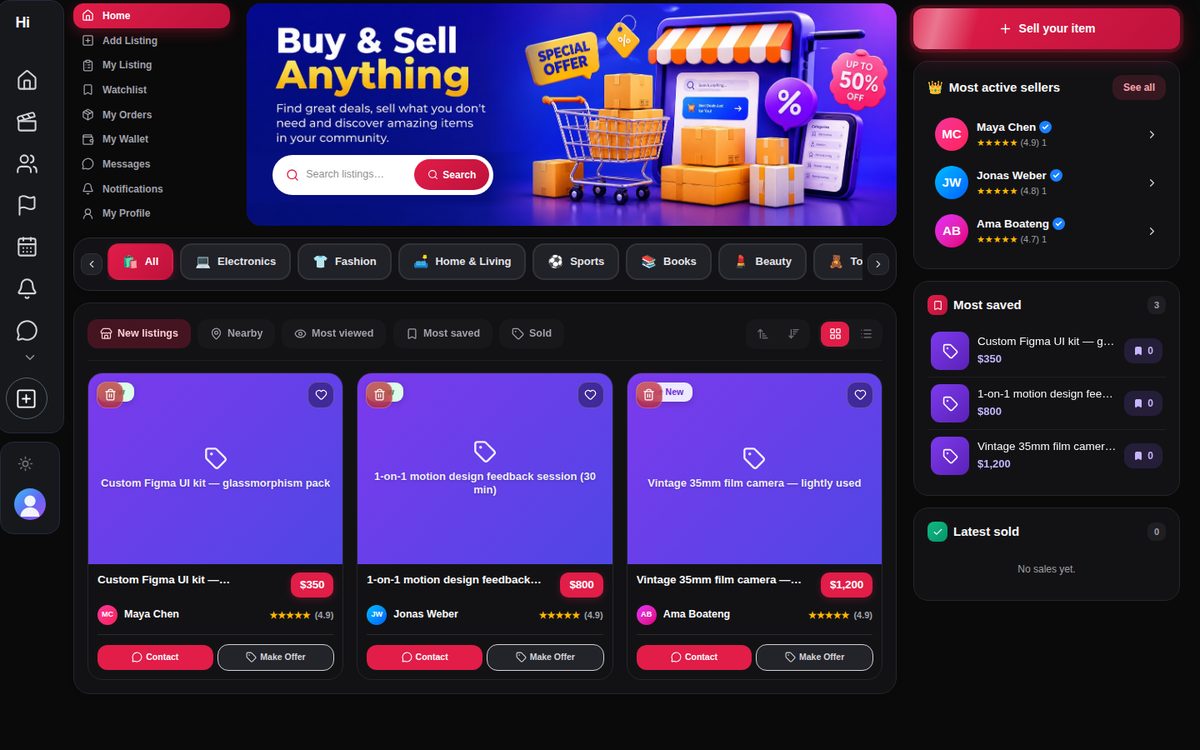
Members list items, vehicles or property with photos and a location picked on a map. Buyers can message the seller, make an offer and save items to a watchlist. Sellers mark an item sold and choose the buyer, who can then leave a review. In Admin → Modules → Marketplace you manage categories, price limits, approval of new listings, and the banner.
Jobs and offers
Jobs: members post roles with salary and type, and candidates apply with a form. Offers: businesses post discounts such as percent off, money off, or buy X get Y.
Crowdfunding
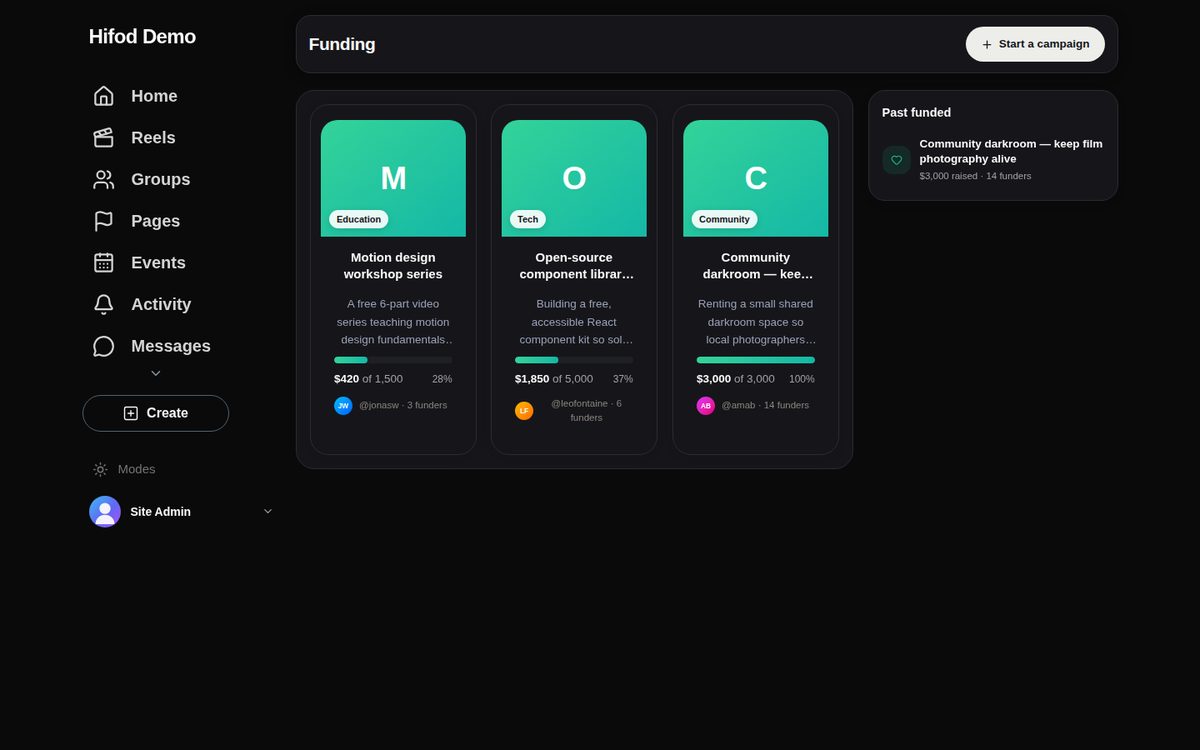
Members start campaigns with a goal. Supporters contribute from their wallet, and progress is shown on each card.
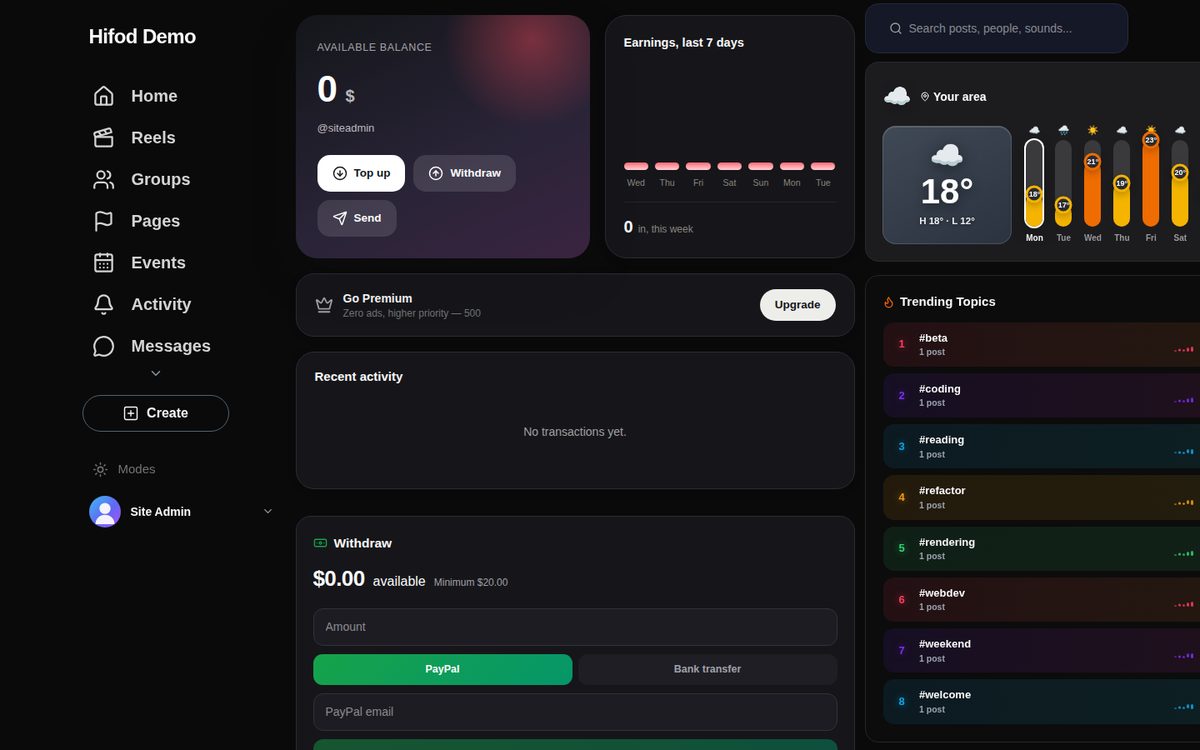
Wallet, tips and gifts
Each member has a wallet page with a balance, top-up, withdraw, and a history. Members can tip each other or send gifts. Gifts are managed in Admin → Modules → Gifts.
Memberships and creator subscriptions
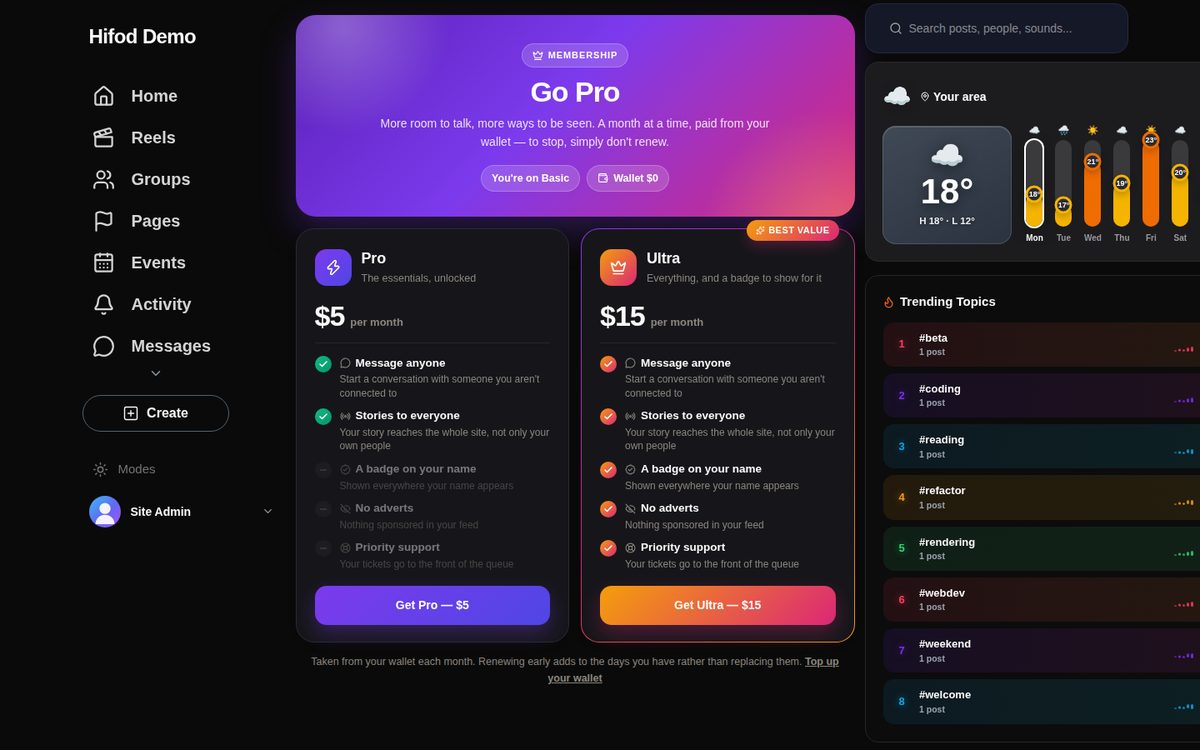
Go Pro offers paid tiers (Pro and Ultra) with benefits you choose, such as messaging anyone, reaching everyone with stories, badges, no adverts and priority support. Prices and benefits are set in Admin → Money → Memberships. Creators can also charge a monthly subscription for their content.
Leaderboard, badges and blogs
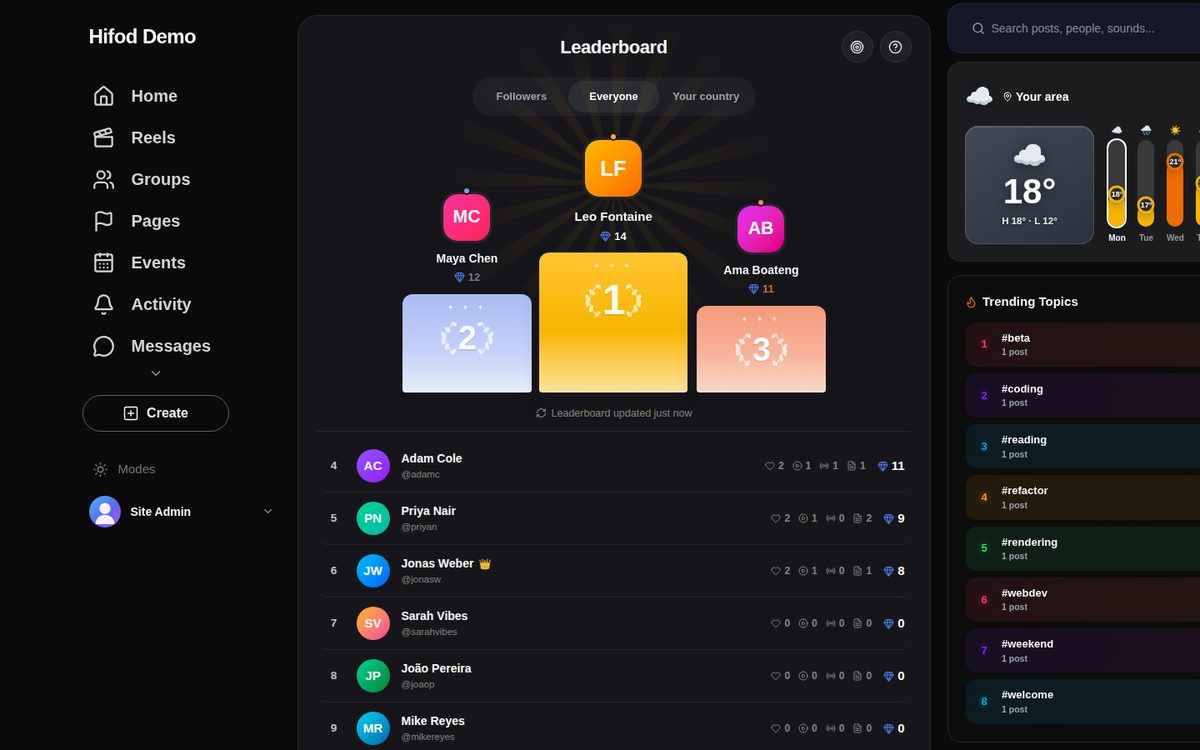
The leaderboard ranks members by followers, engagement and posts. Badges are created in Admin → Modules → Badges and shown next to names. Blogs let members publish long articles in categories.
Adverts and promotions
Members create adverts and pay from their wallet. You can require approval before an advert runs (Admin → Money → Adverts).
Moderation
Reported posts, members and listings appear under Needs attention → Reports. Verification requests and pending sign-ups are under Approvals. Admins can delete any post, reel or listing while browsing the site.
Translate
A Translate button on posts and comments shows them in the reader's language. You can test the translation services in Settings → Posts, and turn the feature off in Plugins.
12.Admin panel map
| Menu | Pages |
|---|---|
| Overview | Dashboard, Update |
| Needs attention | Support tickets, Withdrawals, Reports, Approvals |
| Settings | General, Posts, Registration, Accounts, Email, SMS, Notifications, Chat, Live streaming, Uploads, Security, Limits, Analytics |
| Plugins | Installed (turn features on or off) |
| Appearance | Themes, Sidebar widgets |
| Users | All users, User groups (roles and permissions) |
| Modules | Marketplace, Jobs, Offers, Blogs, Pages, Groups, Events, Funding, Tips, Gifts, Badges |
| Money | Payments and gateways, Currency, Earnings, Adverts, Wallet, Memberships, Creator subscriptions |
| Tools | Backup and logs, Transfer scripts, Static pages |
| Reach | Announcements, Newsletter |
13.Moving from Sngine or WoWonder
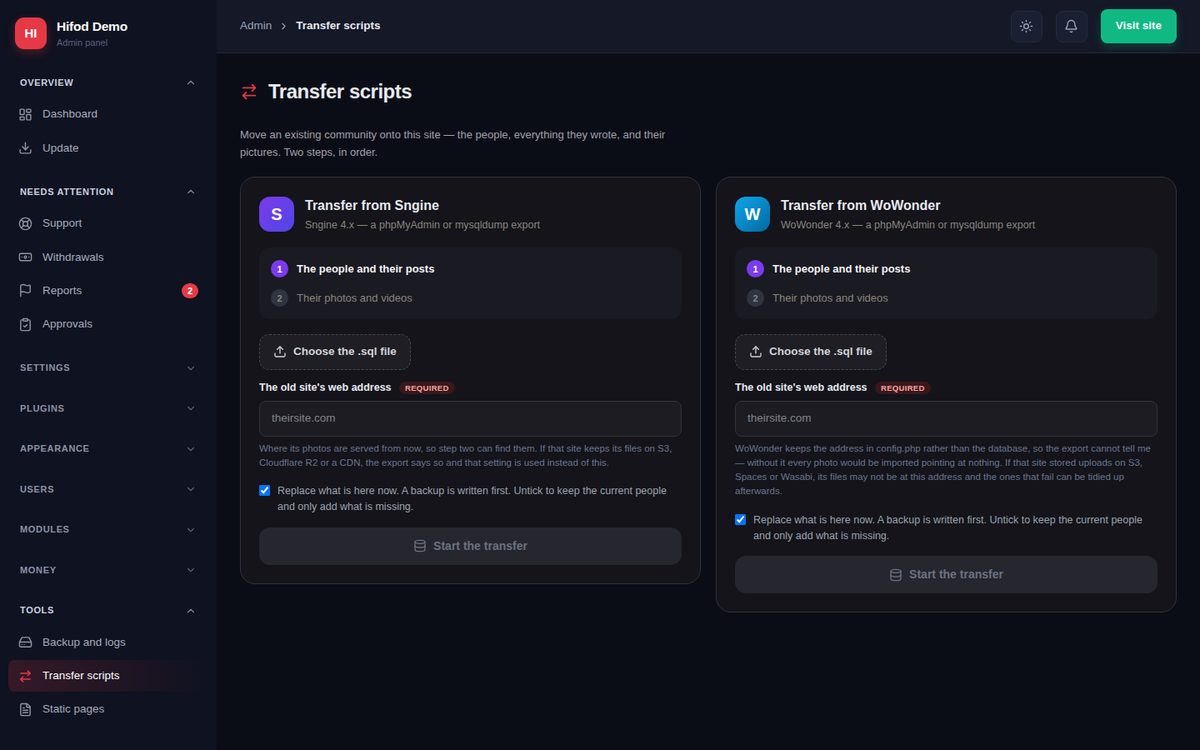
If you already run a community on Sngine 4.x or WoWonder 4.x, Admin → Tools → Transfer scripts moves your members, their posts and their photos to Hifod.
- Export the old site's database as a
.sqlfile (phpMyAdmin → Export, ormysqldump). - Choose the file, and enter the old site's web address so the photos can be found.
- Click Start the transfer. A backup of the current Hifod data is written first. Large files are sent in small pieces, so upload limits don't matter.
- Step two copies the photos and videos to your server or cloud storage. Links that can't be reached can then be removed with Remove old-site links.
14.Themes and customization
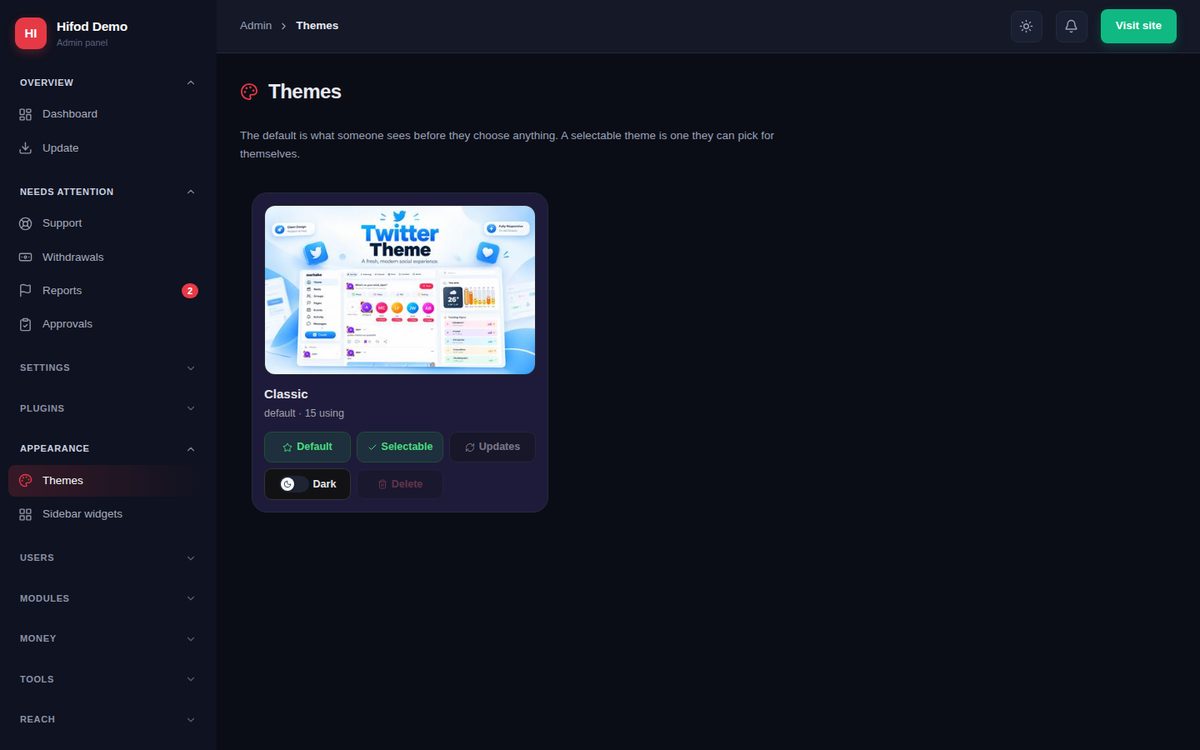
Hifod comes with the Classic theme in light and dark mode. Members switch mode from Modes in the side menu. In Admin → Appearance → Themes you choose the default theme and which themes members may pick.
Change the logo, name and colours
Upload your logo and set the site name in Settings → General. Most colours are CSS variables in app/globals.css. Change them there, then rebuild (see below).
Make your own theme
A theme is a folder in themes/ with a theme.json, an index.ts that lists the parts it replaces, and an optional theme.css. A theme can replace any of these parts: Shell, Header, LeftMenu, RightRail, Footer, PostCard, Composer, Avatar, Button, whole pages, and the Loading and Empty states. Anything a theme leaves out falls back to Classic, so even a half-finished theme gives a working site. See themes/README.md and lib/theme-registry.ts.
Rebuilding after code changes
The download is already built. You only need to rebuild if you change code or CSS, or add a theme. Do this on a computer or VPS with at least 4 GB of RAM:
npm install
npm run build          # or: npm run build:light  (uses less memory)
Then upload the new .next folder and restart the app.
.next folder.15.Updating
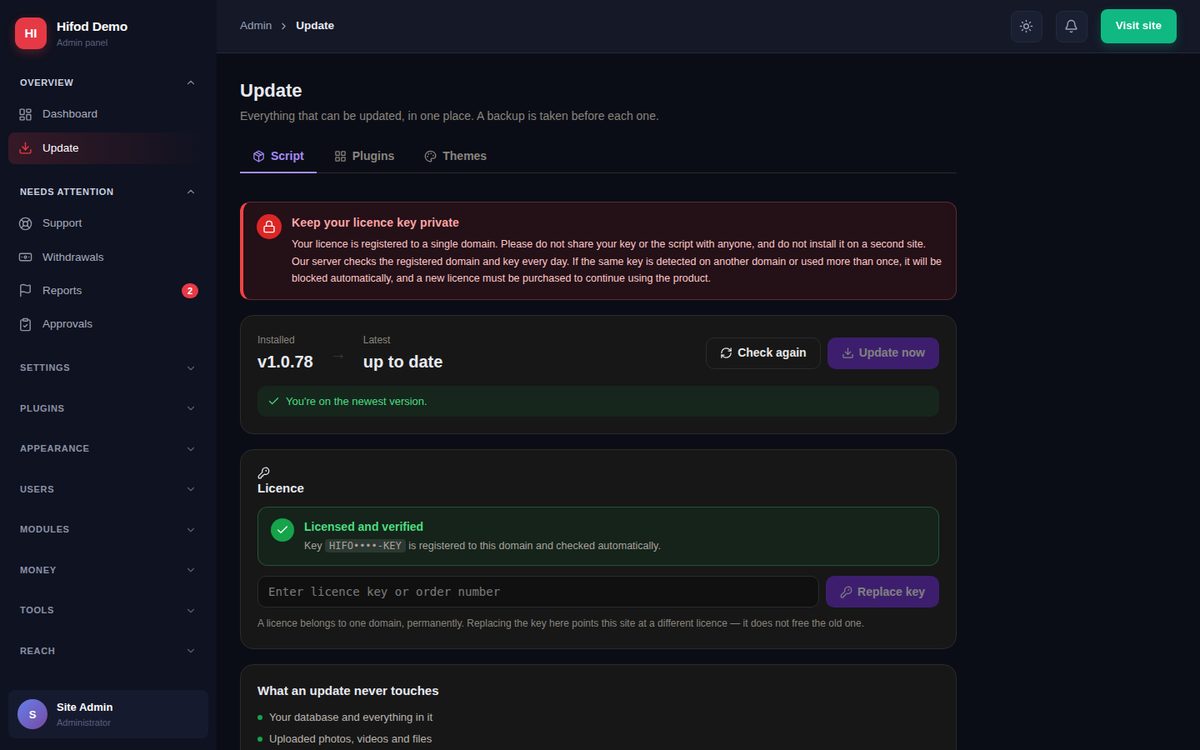
Admin → Overview → Update shows your version and the latest one. Click Update now. A backup is taken first, and your database, uploads, settings and .env are never touched. When it finishes, restart the app (cPanel: Restart, VPS: pm2 restart hifod).
Manual update
- Download the new version from CodeCanyon.
- Back up your database and the
datafolder. - Upload the new files over the old ones. Keep
.env,install.jsonanddata/. - Run NPM Install (cPanel) or
npm install(VPS), then restart the app.
16.Licence activation
- Your purchase code activates Hifod on one domain. The Envato Regular and Extended licences each cover one end product.
- The app checks the licence in the background. If the licence server can't be reached, your site keeps working.
- To see or replace the key, open Admin → Update → Licence.
- If you need to move to a new domain, contact support with your purchase code.
17.Troubleshooting
| Problem | What to do |
|---|---|
| cPanel shows 503 or "Incomplete response" | The app isn't running. Click Run NPM Install, then Restart. Check that the startup file is server.js and that .next was uploaded (turn on hidden files). The app's error log is in the application root as stderr.log. |
| The wizard says the database connection failed | Check the name, user and password. On cPanel, names usually have your account prefix, for example cpuser_hifod. Make sure the user was added to the database with All Privileges. |
| "We could not verify that purchase code" | Copy the code again from your Downloads page. The code is 36 characters long and contains dashes. Each code works on one domain. |
| Can't stay signed in | Use HTTPS. If you are behind a proxy, make sure it passes the Host and X-Forwarded-Proto headers (see the Nginx example). |
| Uploads fail or images don't show | Make sure the data folder is writable (755). Raise the upload limit in Nginx (client_max_body_size) or ask your host. Also check the limits in Settings → Uploads. |
| Sign-up codes never arrive | Set up SMTP in Settings → Email and send a test. Check your spam folder. Until mail works, codes are shown on screen. |
| The build runs out of memory | Use npm run build:light, add swap space, or build on another computer. See section 14. |
| Changes don't show | Press Ctrl+Shift+R (Cmd+Shift+R on Mac) to reload. If you changed code, rebuild and restart the app. |
| Payments are not credited | Check the webhook URL and secret in the gateway's dashboard (section 10). Test mode and live mode use different keys. |
18.Known limitations
- English only. The interface is in English. The Translate feature translates what members post, not the site's own menus and labels.
- Node.js hosting is required. Hifod doesn't run on PHP-only shared hosting.
- Code changes need a rebuild. Settings changed in the admin panel apply straight away. Changes to code, CSS or themes need a rebuild (section 14).
- External services are paid separately. SMTP, SMS, push, live video and cloud storage are billed by those providers.
- No native mobile app. The site works in mobile browsers and can be added to the home screen.
19.Credits and licences
Hifod is built with these open-source projects. Their licences allow commercial use, and the full texts are in each package inside node_modules after npm install.
| Project | Licence |
|---|---|
| Next.js, React, React DOM | MIT |
| Tailwind CSS | MIT |
| Lucide icons (lucide-react) | ISC |
| Material Symbols (Google Fonts) | Apache 2.0 |
| Fonts: Figtree, Gabarito, Sora, DM Sans (Google Fonts) | SIL Open Font License 1.1 |
| Drizzle ORM | Apache 2.0 |
| mysql2, lowdb, nanoid, clsx, date-fns, adm-zip, emoji-picker-react, mp4-muxer, Stripe Node | MIT |
| Nodemailer | MIT-0 |
| bcryptjs, mp4box.js | BSD-3-Clause |
| AWS SDK for JavaScript | Apache 2.0 |
| Map tiles and place search: OpenStreetMap, Nominatim | Data © OpenStreetMap contributors, ODbL. The map shows this credit. Busy sites should follow the OpenStreetMap tile usage policy. |
Images: the demo content uses generated colour avatars and no photos of real people. The images shown in the screenshots are for preview only and are not included unless they are listed in Licensing/credits.txt.
20.Support
Email support@hifod.com, or use the Support tab on the CodeCanyon item page. Please include your purchase code, your domain, and what you were doing when the problem happened. A screenshot helps.
Support follows the Envato Item Support Policy. It covers:
- Help with bugs and problems in Hifod.
- Questions about how features work.
- Help with the included installation steps.
It does not cover:
- Custom changes.
- Server administration.
- Third-party services.
Live demo: demo.hi24.co.uk
21.Changelog
1.0.80 (September 2026)
- First CodeCanyon release.
- Emails are no longer sent to made-up or mistyped addresses, or to the shared demo account.
- Posts with a colour background now show their text on the colour.
- Each install now signs its sign-in cookies with its own random key.
- Footer links to Terms, Privacy and About now open the right pages.
- Renamed the built-in theme to "Classic".
- You can now paste an Envato purchase code on the Update page.